Basics
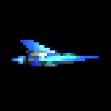
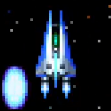

 Salamander 2 has two player ships: The Vic Viper (1P), and the Super Cobra (2P). Although visually distinct, there is almost no game play difference between the two ships, with one exception that will be mentioned in the 'Rank' section below. You can play this game in Single Player as either ship based on which player's controls you use. Multiplayer is co-operative and simultaneously, with each person controlling the ship corresponding to which player they are.
During gameplay, you have access to two buttons: Your main shot button, and the 'Option Shoot' button, while will be explained in the 'Items' section. Some weapons will continue to shoot automatically at a rapid pace when the main shot button is held down, while others will benefit from button mashing. Feel out what you're comfortable with as you play the game. The home versions of the game offer a rapid shot button to make things simpler for you.
Some enemies, especially red ones, will drop items pick-ups. By picking up these items, you will obtain much better weapons, and in one case, defense from a few hits. If you die, you will lose all of your obtained items, and any Option items (see 'Items' section below) you have obtained will drift away from you unless re-collected. This state, in which you have lost your items after death, is known as 'Recovery'.
You should attempt to gain a full complement of items, and then avoid being hit as best you can. If you should unfortunately end up in Recovery, you should immediately shift focus purely onto your survival until you've re-obtained the items you need to be comfortable again.
Like its predecessor, Salamander 2 has both horizontal and vertical stages. It also utilizes a system where you revive in place, rather than checkpoints like you would find in most Gradius titles. This makes Recovery less cruel than it usually is in other titles in the Gradius series.
Upon clearing the game, you will enter a second loop. This is known as Loop 2. Loop 2 has a significantly elevated difficulty (see 'Rank' section below), and disables continues. There is a minor loophole to this: In Multiplayer, you can continue as long as the other player is still alive.
By default, you will get an Extend (extra life) at 200,000 points and 500,000 points. On average, the 200,000 point mark will be hit in Stage 4 or early Stage 5. The 500,000 point mark will not be reached in Loop 1 without special score bonuses.
As general shoot 'em up advice, it's usually best not to keep your back against the back wall of the screen. Rather, you should try to stay a comfortable distance away from it to give yourself room to retreat in a pinch.
Salamander 2 has two player ships: The Vic Viper (1P), and the Super Cobra (2P). Although visually distinct, there is almost no game play difference between the two ships, with one exception that will be mentioned in the 'Rank' section below. You can play this game in Single Player as either ship based on which player's controls you use. Multiplayer is co-operative and simultaneously, with each person controlling the ship corresponding to which player they are.
During gameplay, you have access to two buttons: Your main shot button, and the 'Option Shoot' button, while will be explained in the 'Items' section. Some weapons will continue to shoot automatically at a rapid pace when the main shot button is held down, while others will benefit from button mashing. Feel out what you're comfortable with as you play the game. The home versions of the game offer a rapid shot button to make things simpler for you.
Some enemies, especially red ones, will drop items pick-ups. By picking up these items, you will obtain much better weapons, and in one case, defense from a few hits. If you die, you will lose all of your obtained items, and any Option items (see 'Items' section below) you have obtained will drift away from you unless re-collected. This state, in which you have lost your items after death, is known as 'Recovery'.
You should attempt to gain a full complement of items, and then avoid being hit as best you can. If you should unfortunately end up in Recovery, you should immediately shift focus purely onto your survival until you've re-obtained the items you need to be comfortable again.
Like its predecessor, Salamander 2 has both horizontal and vertical stages. It also utilizes a system where you revive in place, rather than checkpoints like you would find in most Gradius titles. This makes Recovery less cruel than it usually is in other titles in the Gradius series.
Upon clearing the game, you will enter a second loop. This is known as Loop 2. Loop 2 has a significantly elevated difficulty (see 'Rank' section below), and disables continues. There is a minor loophole to this: In Multiplayer, you can continue as long as the other player is still alive.
By default, you will get an Extend (extra life) at 200,000 points and 500,000 points. On average, the 200,000 point mark will be hit in Stage 4 or early Stage 5. The 500,000 point mark will not be reached in Loop 1 without special score bonuses.
As general shoot 'em up advice, it's usually best not to keep your back against the back wall of the screen. Rather, you should try to stay a comfortable distance away from it to give yourself room to retreat in a pinch.
Items
Items will be dropped primarily by enemies that are colored red or orange. However, there are other cases where defeating a full group of enemies will cause an item drop, as well as specific terrain items that may drop an item. Item drops operate under a priority system, as well as being seeded on a per-stage basis. If you kill the same enemies in the same stage in the same order, you will mostly always get the same drops. There are some caveats to this: The game will prioritize Speed Up items if you have less than two, and it will modestly prioritize Missiles if you don't have any. It keeps track of which weapons you have picked up the most, and weapons of that type will appear more often. Speed Up
 The most common and most necessary power-up in any Gradius title. You will almost certainly need at least one of these at all times in order to safely clear the game. Many players prefer to gather more than one Speed Up. However, I recommend you try with one Speed Up at first, and then increase how many you collect if you feel comfortable with higher speeds.
Missile
The most common and most necessary power-up in any Gradius title. You will almost certainly need at least one of these at all times in order to safely clear the game. Many players prefer to gather more than one Speed Up. However, I recommend you try with one Speed Up at first, and then increase how many you collect if you feel comfortable with higher speeds.
Missile

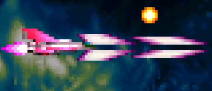
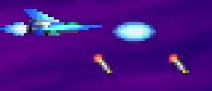 Missiles are a very important part of your arsenal and should always be collected as soon as possible if you don't already have them. These shoot diagonally down in front of you, allowing you to hit enemies that aren't directly in front of you. They will move along the terrain to a limited extent, allowing you to hit enemies that are behind barriers as well.
When you collect a second Missile item, you will upgrade to Twin Missiles. These are basically identical to normal Missiles, but will fire diagonally upward as well, essentially doubling your missile power. Be aware that collecting another Missile item while you have Twin Missiles will downgrade you back to regular Missiles.
In vertical stages, the Twin Missiles have a wider firing arc than the normal Missiles. Don't be fooled. Twin Missiles are still more effective in nearly every scenario.
Option
Missiles are a very important part of your arsenal and should always be collected as soon as possible if you don't already have them. These shoot diagonally down in front of you, allowing you to hit enemies that aren't directly in front of you. They will move along the terrain to a limited extent, allowing you to hit enemies that are behind barriers as well.
When you collect a second Missile item, you will upgrade to Twin Missiles. These are basically identical to normal Missiles, but will fire diagonally upward as well, essentially doubling your missile power. Be aware that collecting another Missile item while you have Twin Missiles will downgrade you back to regular Missiles.
In vertical stages, the Twin Missiles have a wider firing arc than the normal Missiles. Don't be fooled. Twin Missiles are still more effective in nearly every scenario.
Option
 Also known as Multiples in some English versions of Gradius games. Options will follow behind you, copying your every move, and will fire additional shots that are identical to your ship's. Having as many Options as you can is always the best strategy.
Unlike other Items, Options are not completely lost when you die: They will drift around the screen for a while, giving you a chance to pick them back up. This is one of the most significant parts of Recovery, and a mercy on the part of the game.
In Single Player, the maximum amount of Options is 4. In Multiplayer, the maximum amount is 5, but either player is still capped at 4.
You can press the 'Option Shoot' button to fire off one of your Options at a nearby enemy. This is useful against bosses. It will be only be partially consumed: It will become an Option Seed and can be re-collected. If you hold the 'Option Shoot' button down for longer, you can fire multiple Options at once.
Options are more common than any other item in the game, so don't be afraid to use Option Shoot liberally if it fits your personal strategy. I personally use it only rarely, but it's very effective against certain bosses.
Option Seed
Also known as Multiples in some English versions of Gradius games. Options will follow behind you, copying your every move, and will fire additional shots that are identical to your ship's. Having as many Options as you can is always the best strategy.
Unlike other Items, Options are not completely lost when you die: They will drift around the screen for a while, giving you a chance to pick them back up. This is one of the most significant parts of Recovery, and a mercy on the part of the game.
In Single Player, the maximum amount of Options is 4. In Multiplayer, the maximum amount is 5, but either player is still capped at 4.
You can press the 'Option Shoot' button to fire off one of your Options at a nearby enemy. This is useful against bosses. It will be only be partially consumed: It will become an Option Seed and can be re-collected. If you hold the 'Option Shoot' button down for longer, you can fire multiple Options at once.
Options are more common than any other item in the game, so don't be afraid to use Option Shoot liberally if it fits your personal strategy. I personally use it only rarely, but it's very effective against certain bosses.
Option Seed
 These are smaller Options. An Option Seed will orbit around you and automatically shoot, but it doesn't utilize any weapon power-ups you have obtained, always firing a normal shot. If you collect two Option Seeds, they will combine into a full Option.
Cyclone Laser
These are smaller Options. An Option Seed will orbit around you and automatically shoot, but it doesn't utilize any weapon power-ups you have obtained, always firing a normal shot. If you collect two Option Seeds, they will combine into a full Option.
Cyclone Laser

 The Cyclone Laser, often known simply as Laser when there isn't a weaker variation, is an iconic Gradius power-up, and often considered the signature weapon of the Vic Viper space fighter. It fires a narrow, continuous beam ahead of you in long bursts. Laser can get into narrow spots, and in some cases, can pierce through enemies or objects. It does more damage per hit than your default shot, and makes a kind of annoying noise in the process.
 When you collect a second Laser item, you'll upgrade temporarily to the Hyper Ray. The Hyper Ray does significantly more damage and generally fires a bit faster. It will expire and downgrade back to Cyclone Laser after several seconds.
Please note that all three Laser items are mutually exclusive; you can only have one at a time. If you pick up a Cyclone Laser while using a different one, the Cyclone Laser will replace your current weapon.
Ripple Laser
When you collect a second Laser item, you'll upgrade temporarily to the Hyper Ray. The Hyper Ray does significantly more damage and generally fires a bit faster. It will expire and downgrade back to Cyclone Laser after several seconds.
Please note that all three Laser items are mutually exclusive; you can only have one at a time. If you pick up a Cyclone Laser while using a different one, the Cyclone Laser will replace your current weapon.
Ripple Laser

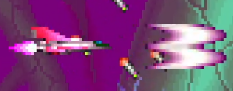
 The Ripple Laser is sometimes considered the signature weapon of the Lord British space fighter, and by proxy, its successor in this game, the Super Cobra. It fires a ring-shaped beam that gets larger the further it travels from your ship. Although it may appear to get stuck on narrow passages, it will actually still hit enemies that require a narrow shot. It does modestly less damage than the Cyclone Laser. This weapon is usually the best weapon for beginners.
 When you collect a second Ripple Laser item, you'll upgrade temporarily to the Buster Ripple. The Buster Ripple is significantly larger and faster than the normal Ripple Laser. It will expire and downgrade back to a normal Ripple Laser after several seconds.
Please note that all three Laser items are mutually exclusive; you can only have one at a time. If you pick up a Ripple Laser while using a different one, the Ripple Laser will replace your current weapon.
Twin Laser
When you collect a second Ripple Laser item, you'll upgrade temporarily to the Buster Ripple. The Buster Ripple is significantly larger and faster than the normal Ripple Laser. It will expire and downgrade back to a normal Ripple Laser after several seconds.
Please note that all three Laser items are mutually exclusive; you can only have one at a time. If you pick up a Ripple Laser while using a different one, the Ripple Laser will replace your current weapon.
Twin Laser

 The Twin Laser is a brute force weapon that dissipates the further it travels from your ship, with a much more narrow size than the other Lasers. This makes it the upgrade to pick up if you want raw power, for killing enemies and bosses faster. Although it gets smaller with distance, even at high distances, it does more damage on average than the other two Lasers. Up close, it does incredible damage. This is a weapon for advanced players.
 When you collect a second Twin Laser item, you'll upgrade temporarily to the Spear Laser. The Spear Laser is even more powerful than the normal Twin Laser, and doesn't dissipate over distance. It will expire and downgrade back to Twin Laser after several seconds.
Please note that all three Laser items are mutually exclusive; you can only have one at a time. If you pick up a Twin Laser while using a different one, the Twin Laser will replace your current weapon.
Force Field
When you collect a second Twin Laser item, you'll upgrade temporarily to the Spear Laser. The Spear Laser is even more powerful than the normal Twin Laser, and doesn't dissipate over distance. It will expire and downgrade back to Twin Laser after several seconds.
Please note that all three Laser items are mutually exclusive; you can only have one at a time. If you pick up a Twin Laser while using a different one, the Twin Laser will replace your current weapon.
Force Field

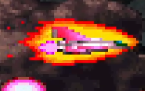 A very rare item to find. The Force Field will engulf your space fighter in a blue or red aura, protecting you from enemy hits. However, no mercy invulnerability is granted, so it can be eaten up quickly if you collide with an object or wall. When using a Force Field, be careful not to rub up against the terrain, lest you erase it by accident.
Be aware that picking up a Force Field drastically increases your Rank.(See 'Rank' section immediately below.)
A very rare item to find. The Force Field will engulf your space fighter in a blue or red aura, protecting you from enemy hits. However, no mercy invulnerability is granted, so it can be eaten up quickly if you collide with an object or wall. When using a Force Field, be careful not to rub up against the terrain, lest you erase it by accident.
Be aware that picking up a Force Field drastically increases your Rank.(See 'Rank' section immediately below.)
Rank
Gradius series games, including Salamander 2, use a dynamic difficulty system known as Rank. Essentially, the better you are doing at the game, the higher your Rank will be, and the more difficult the game will become. Things effected by Rank include: Enemy movement speed, enemy bullet speed, enemy bullet amount, and 'Revenge Bullets', a kind of bullet common to the Gradius series where an enemy will shoot a bullet directly toward your location upon their death. Essentially, things will move faster, shoot more, and at the highest ranks, they will leave behind bullets when killed. A wide variety of things can influence your Rank. Number of enemies killed, amount of Items picked up, and picking up a Force Field are the most noteworthy things that can increase your Rank. Whenever a player ship dies, Rank will immediately decrease significantly. This means you can manipulate your Rank on purpose by staying aware of these factors, such as dying before a section that you find too difficult at high Rank. It is believed that, for unknown reasons, rank increases more gradually for the Super Cobra than for the Vic Viper. In Multiplayer, Rank will always increase significantly faster due to the presence of both ships; most likely, the rank increase rate of both ships is combined, although this is speculation. In Loop 2, the Rank floor and ceiling are both moved significantly higher. There is a small amount of overlap; although you may encounter difficulty at high ranks in Loop 1 that is on par with lower ranks of Loop 2, Loop 2 is incredibly hard by comparison at higher Ranks.
Stages
Salamander 2 contains 6 Stages, each with 1 boss, except for Stage 6, which has 2. A more detailed breakdown of each stage will be added when I have a little more time (and energy). Stage 1: Sub-Life Space (BGM: Silvery Wings Again/Power of Anger)
 After a tangle with some Bacterian space fighters, you'll enter a cave with a Brain Golem in it. This is the first boss from Salamander and Life Force. You can kill it for a huge score bonus, but in order to do so, Twin Laser or a second player is required. To do this, stay close to it and shoot it non-stop. Be mindful of the terrain. (And it'll be really hard even in Multiplayer without Twin Laser!)
Try to sweep the ceilings and floors of the crawling enemies as soon as you can. They can cause you trouble when you least expect it otherwise. Mind the bones that come out of the floor and ceiling; they should be easy to avoid, but if you aren't paying attention, you still may be caught off guard.
Stage 1 Boss: Biter
After a tangle with some Bacterian space fighters, you'll enter a cave with a Brain Golem in it. This is the first boss from Salamander and Life Force. You can kill it for a huge score bonus, but in order to do so, Twin Laser or a second player is required. To do this, stay close to it and shoot it non-stop. Be mindful of the terrain. (And it'll be really hard even in Multiplayer without Twin Laser!)
Try to sweep the ceilings and floors of the crawling enemies as soon as you can. They can cause you trouble when you least expect it otherwise. Mind the bones that come out of the floor and ceiling; they should be easy to avoid, but if you aren't paying attention, you still may be caught off guard.
Stage 1 Boss: Biter
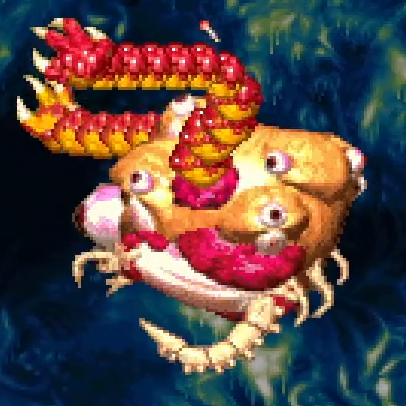
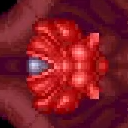
 The battle opens with the Brain Golem standing before you. It will fire several lasers at highly specific angles. Stay back and dodge these carefully; when you're just starting out, it can be easy to get caught off guard by these, and they are surprisingly treacherous if you're at high Rank.
The Brain Golem will be eaten by the Biter. Biter's pattern is very simple: it will spew many tiny wriggling worm enemies. Destroy these and continually fire at Biter. Biter will occasionally charge directly at you. The spot in the center of its mouth is completely safe at these times as long as you stay at the back of the screen.
If you killed the Brain Golem earlier in the stage, you will encounter a very amusing scene at the start of this boss fight.
Stage 2: Firespout Outpost
(BGM: Sensation)
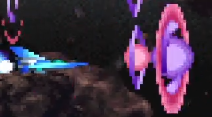
A wide vertical stage with tons of room to move around. The larger artificial suns will create fire spouts, or prominences, that could kill you without warning. Meanwhile, the smaller artificial suns will try to ram into you once they've been activated.
Careful movement is important in this stage, and there are two waves of Zub enemies that can spawn suddenly, potentially right on top of you. Memorizing when and where this happens is important. The Ripple Laser can be very useful here if you're having trouble with the amount of enemies.
Stage 2 Boss: Hydra
The battle opens with the Brain Golem standing before you. It will fire several lasers at highly specific angles. Stay back and dodge these carefully; when you're just starting out, it can be easy to get caught off guard by these, and they are surprisingly treacherous if you're at high Rank.
The Brain Golem will be eaten by the Biter. Biter's pattern is very simple: it will spew many tiny wriggling worm enemies. Destroy these and continually fire at Biter. Biter will occasionally charge directly at you. The spot in the center of its mouth is completely safe at these times as long as you stay at the back of the screen.
If you killed the Brain Golem earlier in the stage, you will encounter a very amusing scene at the start of this boss fight.
Stage 2: Firespout Outpost
(BGM: Sensation)
A wide vertical stage with tons of room to move around. The larger artificial suns will create fire spouts, or prominences, that could kill you without warning. Meanwhile, the smaller artificial suns will try to ram into you once they've been activated.
Careful movement is important in this stage, and there are two waves of Zub enemies that can spawn suddenly, potentially right on top of you. Memorizing when and where this happens is important. The Ripple Laser can be very useful here if you're having trouble with the amount of enemies.
Stage 2 Boss: Hydra
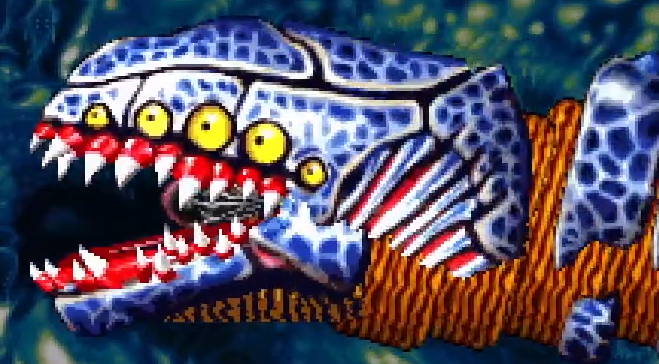
 The Hydra will constantly fire long, narrow bursts of flame from its many mouths. However, the many heads of this beast can only move a certain amount of distance left or right at any given moment, and the main ship will only move at certain long intervals. If you stay diagonally away from the boss's furthest head, it basically won't be able to hit you.
Every so often, it will draw in its heads and spew out massive flames. These will go a short distance or a long distance. Most commonly, it will be a short distance, giving you a good chance to attack the enemies. But be ready to withdraw if the flames seem to be drawing close to you.
You can lure this boss by staying in a far corner of the screen and waiting for it to move to match you, then moving away as needed.
Stage 3: Biohazard
(BGM: All is Vanity)
You must prioritize having Twin Missiles here at all costs. Enemies will attack from above and below in hard-to-reach places without mercy, as well as swooping in above and below you unexpectedly. The Cyclone Laser is also recommended for this level due to a section near the very end, where large round masses must be destroyed while arms block the way. The Cyclone Laser simply has the best ability to reach and destroy these masses.
Try to keep your eyes sharp, because the enemies in this stage attack with tiny lymphocytes that may be especially difficult to see.
Stage 3 Boss: Abaddon
The Hydra will constantly fire long, narrow bursts of flame from its many mouths. However, the many heads of this beast can only move a certain amount of distance left or right at any given moment, and the main ship will only move at certain long intervals. If you stay diagonally away from the boss's furthest head, it basically won't be able to hit you.
Every so often, it will draw in its heads and spew out massive flames. These will go a short distance or a long distance. Most commonly, it will be a short distance, giving you a good chance to attack the enemies. But be ready to withdraw if the flames seem to be drawing close to you.
You can lure this boss by staying in a far corner of the screen and waiting for it to move to match you, then moving away as needed.
Stage 3: Biohazard
(BGM: All is Vanity)
You must prioritize having Twin Missiles here at all costs. Enemies will attack from above and below in hard-to-reach places without mercy, as well as swooping in above and below you unexpectedly. The Cyclone Laser is also recommended for this level due to a section near the very end, where large round masses must be destroyed while arms block the way. The Cyclone Laser simply has the best ability to reach and destroy these masses.
Try to keep your eyes sharp, because the enemies in this stage attack with tiny lymphocytes that may be especially difficult to see.
Stage 3 Boss: Abaddon
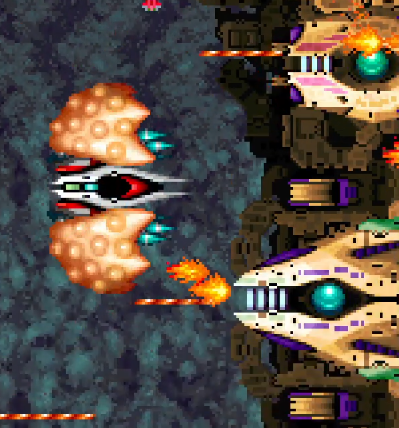
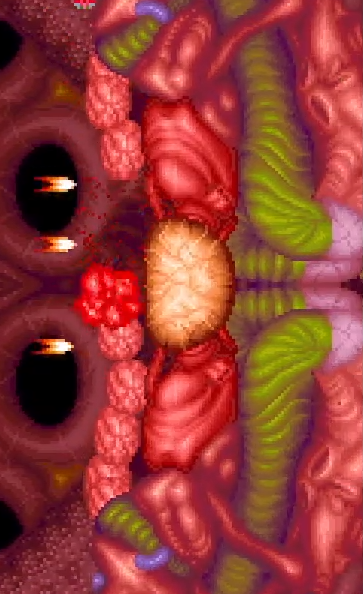 Abaddon presents as a small fleshy creatures proteced by several walls of muscle tissue and discolored veins. Enemies will appear at regular intervals from the several black holes in the background. The best strategy is to move from the top down or vice-versa to line up your Options with all of the targets in the far side of the screen, then just letting them take care of it. Adjust position if necessary, but don't try to engage it on its own terms.
 After the destruction of its defenses, Abaddon will rush out after you and generate two ropey bullet patterns. Get between these patterns and keep moving continually. You should be able to defeat it easily as long as you don't accidentally run into the bullet ropes, but be careful to watch out for changes in Abaddon's movement.
Stage 4: Giant Battleship Fleet
(BGM: Serious! Serious! Serious!/Last Exit)
You'll find yourself constantly assailed by missiles early into this stage. Destroying each battleship that is firing missiles will make the barrages stop. If something is above you, it's advisable to make a protective umbrella using your Options. As long as something is shooting the missiles before they hit you, you'll be fine until you get to the last two battleships.
The last real battleship requires you to take out several missile batteries and small enemy fighters as you progress along it, followed by a tight squeeze between it and the battleship below it. Be very careful how you move during these sections, and exercise caution over point gain. If you've killed almost every enemy up to now, you'll most likely get an Extend during this section.
Stage 4 Boss: Tennie Rope
After the destruction of its defenses, Abaddon will rush out after you and generate two ropey bullet patterns. Get between these patterns and keep moving continually. You should be able to defeat it easily as long as you don't accidentally run into the bullet ropes, but be careful to watch out for changes in Abaddon's movement.
Stage 4: Giant Battleship Fleet
(BGM: Serious! Serious! Serious!/Last Exit)
You'll find yourself constantly assailed by missiles early into this stage. Destroying each battleship that is firing missiles will make the barrages stop. If something is above you, it's advisable to make a protective umbrella using your Options. As long as something is shooting the missiles before they hit you, you'll be fine until you get to the last two battleships.
The last real battleship requires you to take out several missile batteries and small enemy fighters as you progress along it, followed by a tight squeeze between it and the battleship below it. Be very careful how you move during these sections, and exercise caution over point gain. If you've killed almost every enemy up to now, you'll most likely get an Extend during this section.
Stage 4 Boss: Tennie Rope
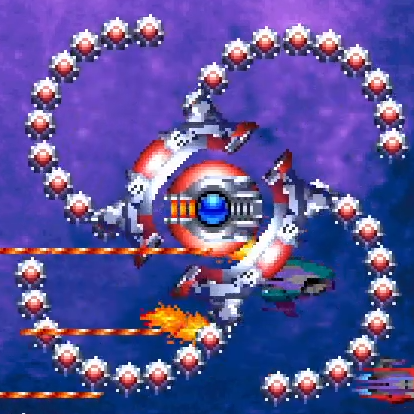 Tennie Rope, with its 4 tentacles, will constantly spin around, occasionally reversing directions. The only vulnerable section is the blue core at the center. Adds will come in from the right side of the screen frequently, and their bullets are likely to trip you up. Start in the bottom-left for this fight, and watch the adds' movemenets carefully.
It may look impossible to hit the core with the Ripple Laser, but despite impacting on the barrier shield, it will manage to break through just fine. If for any reason you die, move straight to the center of Tennie Rope and destroy the core while you're still invincible; it will go down like paper even to the basic shot like this. No reason to risk more than one death against this boss.
Stage 5: Asteroid Fortress
(BGM: Speed/Planet Ratis)
This horizontal stage is incredibly tall, with numerous paths to take. The most important thing is to be constantly aware of your surroundings, because enemies in this stage often move very quickly. There are many green spawners that will constantly send fighters out and right for you, so destroy these as quickly as possible. There are also many stationary turrets; try to send missiles in to take care of these instead of getting close yourself.
You will need at least one Speed Up by the time you reach the boss fight, and Cyclone Laser or Twin Laser are recommended.
Stage 5 Boss: Plate Core
Tennie Rope, with its 4 tentacles, will constantly spin around, occasionally reversing directions. The only vulnerable section is the blue core at the center. Adds will come in from the right side of the screen frequently, and their bullets are likely to trip you up. Start in the bottom-left for this fight, and watch the adds' movemenets carefully.
It may look impossible to hit the core with the Ripple Laser, but despite impacting on the barrier shield, it will manage to break through just fine. If for any reason you die, move straight to the center of Tennie Rope and destroy the core while you're still invincible; it will go down like paper even to the basic shot like this. No reason to risk more than one death against this boss.
Stage 5: Asteroid Fortress
(BGM: Speed/Planet Ratis)
This horizontal stage is incredibly tall, with numerous paths to take. The most important thing is to be constantly aware of your surroundings, because enemies in this stage often move very quickly. There are many green spawners that will constantly send fighters out and right for you, so destroy these as quickly as possible. There are also many stationary turrets; try to send missiles in to take care of these instead of getting close yourself.
You will need at least one Speed Up by the time you reach the boss fight, and Cyclone Laser or Twin Laser are recommended.
Stage 5 Boss: Plate Core
 I can't emphasize this enough: You can't reasonably fight this thing without at least one Speed up.
This boss is comprised of numerous parts. First, there are several cores protected by barrier shields at the farthest wall. These are the actual goal; anything else is optional to destroy. The large cores will drop Speed Ups when killed, while the smaller ones will drop Options. However, getting back there is dangerous enough as it is.
At the start of the fight, the boss will be protected by a large space fighter with two large shield plates on its wings. You have to destroy each of these shields plates in order to defeat the space fighter. While the plates are intact, they will spew huge amounts of bullets or missiles. Try to stay diagonal from it as much as possible and let your Options do the work. Getting too close will mean death until its shield plates are destroyed.
After destroying the large space fighter, a smaller shield enemy will appear and begin rapidly to block whatever core you seem to be after. During this phase of the fight, keep moving vertically as much as possible. This enemy can be destroyed, although another will spawn not long after; but if you just engage this enemy each time, the fight is likely to time out.
If, however, you have no Speed Ups, timing this boss out may actually be your best option. Just wait long enough and dodge the enemy attacks from the safest spot you can find, and eventually it will explode on its own.
Stage 6: Dear Blue/Doom's Stronghold
(BGM: Dear Blue)
The stage opens with wave after brutal wave of Bacterian fighters coming in from the top of the screen. Try to sweep them from side to side until it's safe for you to move on. From this point, the most important information you can have is that it's important to stay toward the left half of the screen.
There will be some enemies and even some items on the right side of the screen, but if at any point in the mission you lose control of the left side of the screen, you are pretty much doomed. So take out everything on the left first, then move over for the right. Watch out for the Moai that can be revealed under the panels; they will shoot quite a lot in a circular pattern, but their shots can be destroyed.
When crystal objects begin to rain down upon you, get back toward the bottom edge of the screen and carefully shoot at them with help from your options, dodging if necessary. Be aware that one sneaky wave of enemies will pop in during this part on each side of the screen.
Stage 6 Boss: Cerberus
I can't emphasize this enough: You can't reasonably fight this thing without at least one Speed up.
This boss is comprised of numerous parts. First, there are several cores protected by barrier shields at the farthest wall. These are the actual goal; anything else is optional to destroy. The large cores will drop Speed Ups when killed, while the smaller ones will drop Options. However, getting back there is dangerous enough as it is.
At the start of the fight, the boss will be protected by a large space fighter with two large shield plates on its wings. You have to destroy each of these shields plates in order to defeat the space fighter. While the plates are intact, they will spew huge amounts of bullets or missiles. Try to stay diagonal from it as much as possible and let your Options do the work. Getting too close will mean death until its shield plates are destroyed.
After destroying the large space fighter, a smaller shield enemy will appear and begin rapidly to block whatever core you seem to be after. During this phase of the fight, keep moving vertically as much as possible. This enemy can be destroyed, although another will spawn not long after; but if you just engage this enemy each time, the fight is likely to time out.
If, however, you have no Speed Ups, timing this boss out may actually be your best option. Just wait long enough and dodge the enemy attacks from the safest spot you can find, and eventually it will explode on its own.
Stage 6: Dear Blue/Doom's Stronghold
(BGM: Dear Blue)
The stage opens with wave after brutal wave of Bacterian fighters coming in from the top of the screen. Try to sweep them from side to side until it's safe for you to move on. From this point, the most important information you can have is that it's important to stay toward the left half of the screen.
There will be some enemies and even some items on the right side of the screen, but if at any point in the mission you lose control of the left side of the screen, you are pretty much doomed. So take out everything on the left first, then move over for the right. Watch out for the Moai that can be revealed under the panels; they will shoot quite a lot in a circular pattern, but their shots can be destroyed.
When crystal objects begin to rain down upon you, get back toward the bottom edge of the screen and carefully shoot at them with help from your options, dodging if necessary. Be aware that one sneaky wave of enemies will pop in during this part on each side of the screen.
Stage 6 Boss: Cerberus
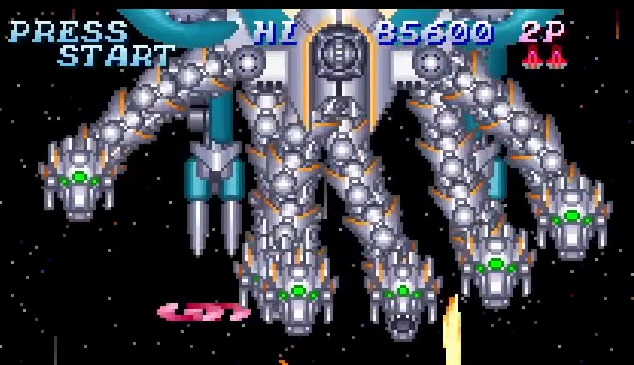
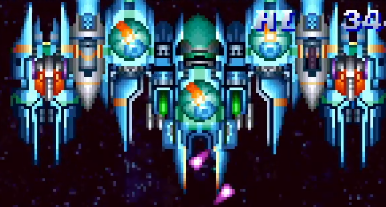 This boss is comprised of a main unit with two laser pods on each side, and two sub units with one laser pod each. The sub units will move somewhat independently left and right compared with the main unit, but generally the movements are fairly predictable. It's the lasers themselves that are the problem.
Every so often, this boss will fire its lasers, generally straight down. The easiest way to avoid these is to simply not be in front of them, always staying one step ahead of or behind the boss's movements. This is recommended.
However, the boss will eventually change patterns and fire all of its lasers at once, firing its sub units in a circular pattern. This pattern is extremely difficult to avoid. One of the best things you can do here is recognize when this is about to happen, and position yourself in the top-left or top-right corner next to the boss, avoiding any stray fire.
All of the laser pods are destructible. However, the sub unit pods have less health than the main unit pods, which are difficult to destroy. You might consider taking out one or both of the sub units first to make the more complex patterns easier to avoid.
If the center of the main unit is destroyed, the boss will die immediately, regardless of any parts left undestroyed.
Final Boss: Doom
This boss is comprised of a main unit with two laser pods on each side, and two sub units with one laser pod each. The sub units will move somewhat independently left and right compared with the main unit, but generally the movements are fairly predictable. It's the lasers themselves that are the problem.
Every so often, this boss will fire its lasers, generally straight down. The easiest way to avoid these is to simply not be in front of them, always staying one step ahead of or behind the boss's movements. This is recommended.
However, the boss will eventually change patterns and fire all of its lasers at once, firing its sub units in a circular pattern. This pattern is extremely difficult to avoid. One of the best things you can do here is recognize when this is about to happen, and position yourself in the top-left or top-right corner next to the boss, avoiding any stray fire.
All of the laser pods are destructible. However, the sub unit pods have less health than the main unit pods, which are difficult to destroy. You might consider taking out one or both of the sub units first to make the more complex patterns easier to avoid.
If the center of the main unit is destroyed, the boss will die immediately, regardless of any parts left undestroyed.
Final Boss: Doom
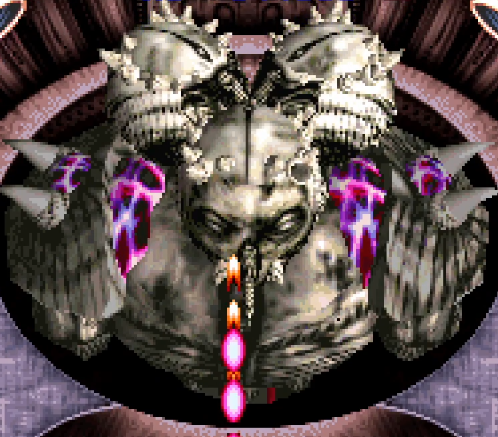 Often mistaken for another Gradius series boss, Giga, due to his BGM, Giga's Rage. It's typical for Gradius final bosses to be passive, but not him. He will make you work for it.
He has four main attack patterns: Spawn bugs, sprinkle bullets, fire homing missiles, and throw bombs.
When he spawns bugs, just kill them. At higher Rank, they will have Revenge Bullets, so always stay aware when killing them. The first waves will drop some Items. If you die, the next wave will drop a Speed Up during Recovery.
When he sprinkles bullets, try to stay at the bottom of the screen roughly 1/4th from the left or right of the screen. This should make it trivial to dodge by moving left/right unless you are in Loop 2.
When he fires homing missiles, move to one side of the screen, then weave to the other side once they start to home in. In Multiplayer, they will track the Vic Viper unless the Vic Viper is destroyed; be careful not to let your guard down if you're playing as the Super Cobra, since they can suddenly switch target to you.
When he throws bombs (they are purple), I recommend halting all attack. The bombs will explode into bullets that may be difficult to avoid during the mess, but they are easy to avoid on their own. Be aware that he may spawn a couple of bugs during this phase unexpectedly; just avoid their shots until it's safe to hit them. If your shots don't pierce, you can still take potshots at Doom himself during this phase.
With this, you should have everything you need to at least clear the game. Good luck!
Often mistaken for another Gradius series boss, Giga, due to his BGM, Giga's Rage. It's typical for Gradius final bosses to be passive, but not him. He will make you work for it.
He has four main attack patterns: Spawn bugs, sprinkle bullets, fire homing missiles, and throw bombs.
When he spawns bugs, just kill them. At higher Rank, they will have Revenge Bullets, so always stay aware when killing them. The first waves will drop some Items. If you die, the next wave will drop a Speed Up during Recovery.
When he sprinkles bullets, try to stay at the bottom of the screen roughly 1/4th from the left or right of the screen. This should make it trivial to dodge by moving left/right unless you are in Loop 2.
When he fires homing missiles, move to one side of the screen, then weave to the other side once they start to home in. In Multiplayer, they will track the Vic Viper unless the Vic Viper is destroyed; be careful not to let your guard down if you're playing as the Super Cobra, since they can suddenly switch target to you.
When he throws bombs (they are purple), I recommend halting all attack. The bombs will explode into bullets that may be difficult to avoid during the mess, but they are easy to avoid on their own. Be aware that he may spawn a couple of bugs during this phase unexpectedly; just avoid their shots until it's safe to hit them. If your shots don't pierce, you can still take potshots at Doom himself during this phase.
With this, you should have everything you need to at least clear the game. Good luck!